Importing Arrayscan data
This option is not available in the default menu that is set when you first install the program as most labs will not have an Arrayscan store. Additionally, you must have tab Thermo in Excel. If the ribbon tab says Add-ins then you cannot directly import data from an Arrayscan store because the Thermo Addin that allows Excel to talk to an Arrayscan store is not installed. Assuming your version of Excel can talk to an Arrayscan store, first go to Platemaker Wizard “Program Options” and in the Menu Options Importing Utilities section, select from the dropdown list one of the options that includes the Arrayscan Import function (Figure 1).

Open a workbook that has been built by the Platemaker Wizard and is where you want to send the Arrayscan store data.
Select Platemaker Wizard ![]() Import Arrayscan Data. The menu of Figure 2 will be displayed.
Import Arrayscan Data. The menu of Figure 2 will be displayed.
Push the centre button “Populate Source Workbook with Plate Data”
This prompt will appear
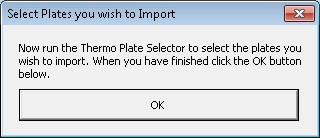
Do not push OK!

Go back to thermos menu and select “Launch plate selector”
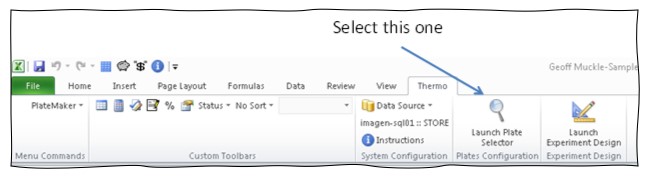
The following Thermofisher store menu will appear
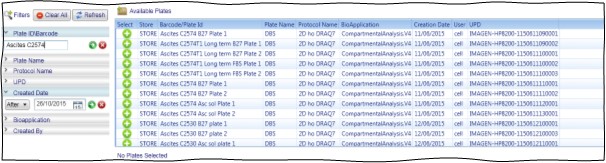
Now use the filters on the left to select the appropriate plates. In this example, I have type “Ascites C2574 into PlateID/Barcode
Now select the plates from this you want to import using the green + key
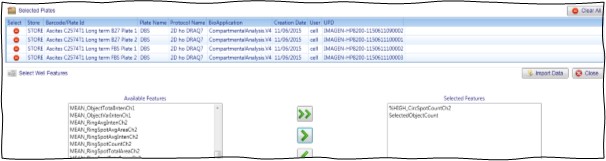
Once you have selected the plates you will get a screen similar to that shown in Figure 3.
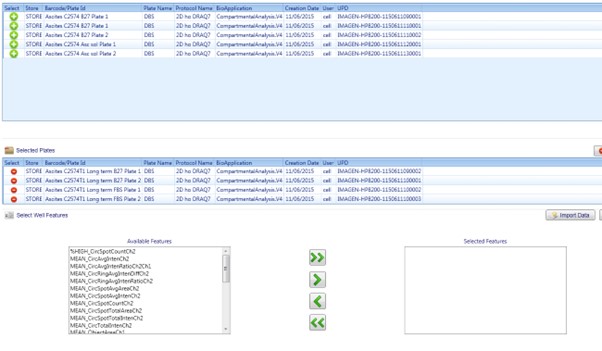
Now select the features you want to import. In our example we will import SelectedObjectCount and %High_CircSpot_CountCh2.
Now click Import Data button.
You will now be returned to the following prompt.
Now you can push OK.
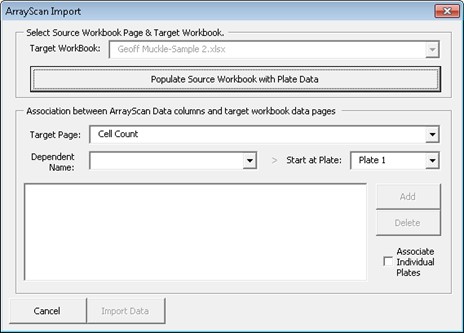
Now you will be returned to this screen but this time the dependent variable dropdown box is active (Figure 4).
At this point you need to associate the target plate name variable with the Arrayscan variable by using the dropdown box on Dependent Name (Figure 5).
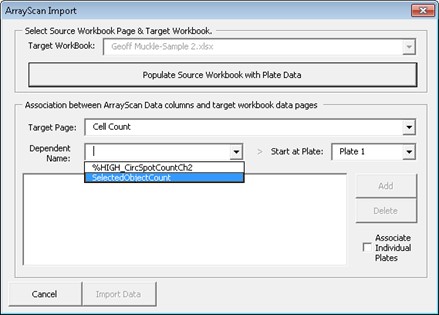
For example, Cell Count will be associated with SelectedObjectCount and Cell Death will be associated with %High_CircSpotCountCh2. Once you have selected the correct Arrayscan variable push the Add key which will be active. After both have been associated your import screen should look something like Figure 6.
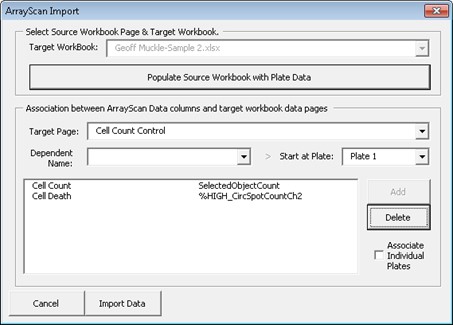
Now click the import data button.
You will see the plates imported and will end up on a new workbook page called “Import Info” which contains the unique Store database IDs of the plates you have imported and the matching of the workbook dependent variables with the Arrayscan variables that you have created (Figure 7).
