Adding a Z’ Page
Select Platemaker Wizard ![]() Add Z’ Page to get the submenu of Figure 1.
Add Z’ Page to get the submenu of Figure 1.
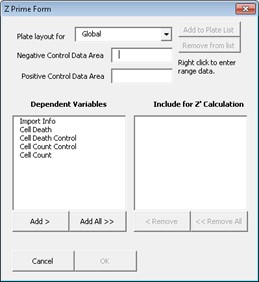
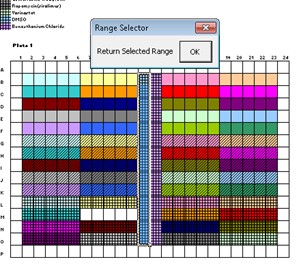
To define the negative and positive control areas on the plate right click inside the text boxes or if you know the addresses directly, just type them in. Assuming you right click, you will be taken to your plate map page where you can simply use whichever map you want to select your positive and negative control areas (Figure 2).
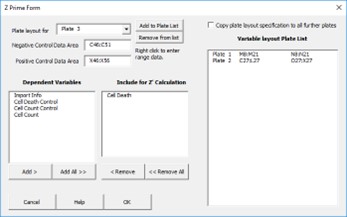
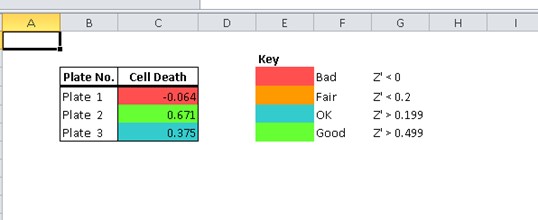
After filling in both the negative and positive control areas and also selecting which dependent variables you want to calculate the z’, the completed menu should look similar to Figure 4 (but without the variable layout list box showing). Pushing OK at this point leads to a Z prime report like the one shown in Figure 3.
Note if you have used different control layouts per plate, you can define different control layouts by using the dropdown menu in the “Plate Layout” field. For example, you can change “Global” to “Plate 1” and then define the ranges on plate 1. Once all this information is added simply push the active “Add to Plate List” button. Now you can define the plate layout for plate 2 etc. and this way all the plates can be defined. If you get to a point where the plate layout is the same for the remaining number of plates you can also tick the “Copy plate layout specification to all further plates” option which is only visible in the extended Z’ plate menu (Figure 4). Likewise, if not all your plates contained controls, simply do not add those plates to the plate list box.