Page 4: Platemaker Wizard Equation Editor
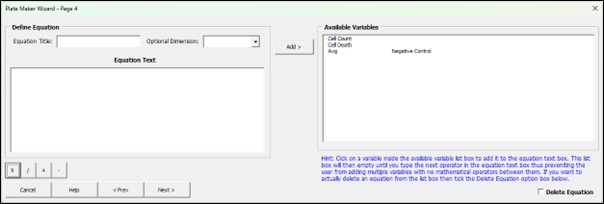
Define Equation
Equation Title: Give your equation a name that reflects what the equation is doing. For example, if you ratio two dependent variables (Dep 1, Dep 2) you might call the equation “Dep 1 Dep 2 ratio”.
Optional Dimension: You may want to give the values your equation produces a dimension which you can enter here in this dropdown list box that saves dimensions previously entered.
Equation Text: This is where the equation you want is constructed. The syntax for the equation follows the syntax used when creating Excel equations except, rather than entering individual cells to be used as inputs, the inputs are shown in the “Available Variables” box on the right. Initially, the Available Variables are the dependent variables of the experiment plus any control averages that were requested from the plate controls menu. The plate controls represent a single calculated value that, depending on the control plating frequency, will be a unique value for every plate in the experiment or one value per experimental repeat. The [Dependent Variable] references consist of as many elements as the independent variable values defined for the experiment.
Consider the two dependent variables “pEGFR” and “Total EGFR”. Each dependent variable has 8 elements. If you select to ratio the two, that is in the text box we type [pEGFR]/[Total EGFR] then when the workbook is built, this formula will appear 8 times with each dependent label replaced with the unique cell address for the particular element of that dependent variable that is currently being used in the calculation. For example [pEGFR]/[EGFR] → element 7 → “Cell address for pEGFR element 7”/”Cell address for EGFR element 7”.
Arithmetic buttons
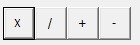
These buttons can be used to add the 4 arithmetic operators plus, minus, add and divide.
Available Variables: List the variables that are available for use in the Equation text box. Clicking on any variable in the list box instantly adds it to the Equation text box simplifying the writing of equations and saving the user the trouble of typing out each dependent variable name. As soon as an available variable is selected, the box empties to prevent the user from entering two available variables next to one another without a mathematical operation between them. As soon as an arithmetic operator is added to the equation box, the available variable box is repopulated so that another variable can be selected to use in the Equation Text box.
Add Button: Once the user has finished writing their equation it can be added to the available variable box by pushing the Add button. It can then be selected along with the other variables in this list box to form a new equation meaning that it is possible to use the output of one equation as the input of another equation forming a chain of dependent equations which can simplify the construction of very complicated equations by breaking them into steps.
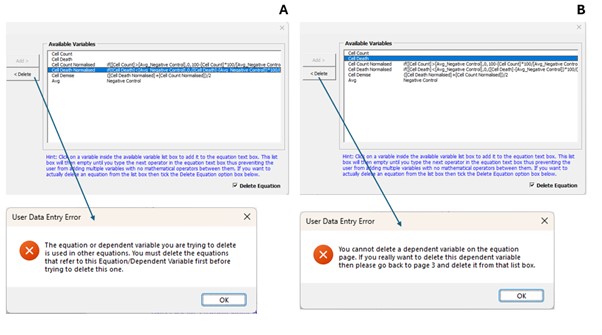
Delete Checkbox: If you want to delete an equation, you need to first tick the Delete checkbox which will then add a Delete button under the Add button. Now when an equation label is selected in the “Available Variables” list box, the list box labels remain so that the selected label can be removed by simply pushing the Delete button.
Note you cannot delete an equation if its output is used in a later equation. For example, in the Ovarian Cancer Screen Demonstration workbook, if you try to delete either “Cell Count Normalised” or “Cell Death Normalised” before deleting the dependent equation “Cell Demise” you will get an error message as shown in Figure 1A. Likewise, you cannot delete dependent variables on the equation page Figure 1B. Dependent variables must be deleted using page 3: “Dependent Variables and Control Samples” page of the Wizard and these variable too can only be deleted once all equations using these dependent variables have been deleted from the Equation editor page (Figure 1).
< Prev button: Steps back to Page 3, the Dependent Variables and Controls page.
Next > button: Steps forward to Page 5, the Plate Designer page.